Blissfulbritt
  • All About Brittany
  • Blogging For Dummies
  • Coffee
  • DIY
  • Europe
  • iHike
  • North America
  • Work With Me
  • Tag: DIY

    • DIY Halloween Costumes

      Posted at 5:00 AM by Brittany, on November 11, 2020

      Anyone who knows me knows I LOVE Halloween. October is the superior of all months, fall is the only worth while season, and autumn changing leaves quite literally give me life. I also adore black cats, pumpkins taste like cake when cooked right, and corn mazes make me feel like an explorer.

      However, all that said I don’t typically love to dress up. I don’t love parties, I don’t love the attention wearing a costume brings, and I get an odd anxiety when I’m one of the only people in a room who is not in costume. Like when I am working somewhere that advocates for Halloween participation.

      I recently and somewhat unexpectedly got a job at REI. I have always wanted to work for REI, and when I saw the store in my town was hiring I decided why not. I needed something to do while I figure out what’s next for me, and traveling isn’t an option right now, so I’m currently getting paid to research about my hobbies.

      Every job I have worked in the past has encouraged employees to dress up for Halloween, but REI decided to take it one step further and encouraged us to dress up for Halloween…for an entire week. I initially thought I would sit out on this game of participation, but when more and more people were dressing up I decided I needed to play too.

      Especially when there were such awesome prizes at stake…

      Participation alone earned you an extra 10% off coupon. As an employee I get 30% off, and with this coupon I can get 40% off most anything in the store. I have my eye on a Yakima FullBack that I’d save $100 on with this coupon! Then there were the prizes for the best costumes: a full paid day off work, a half paid day off work, a $25 TJ’s gift card, and two $25 Starbucks gift cards.

      Game on REI, I’m in.

      Now, I am a frugal human. I always have been and likely always will be. So I knew spending a lot of money on a costume wasn’t going to happen. I also didn’t want something uncomfortable or high maintenance as I was going to be working 8 hours in whatever I chose to wear. I decided on two costumes for the week, one to wear on Halloween, and one to wear the day before.

      First up…the Domino.

      This was by far one of the easiest last minute costume I could have possibly chosen. I spent a whopping $4.17 to make this costume, and I will 100% be doing this again. I went to Michaels and bought white felt with a sticky backing, cut circles using a standard masking tape roll as my template, and slapped them onto some already owned black clothing.

      And of course the mask, don’t forget the mask.

      This costume was fun, easy, and most of all COMFORTABLE. I accepted my first extra 10% off coupon after a full day of work, and made my way home to make costume number two. My choice for the next costume I wore on Halloween was a bit of a surprise, not only for myself, but for my family.

      I chose the scariest costume I could have possibly worn – my real life phobia on my back and on my head. I bought brown craft paper, masking tape, yellow ribbon, a headband, yellow cotton balls, and superglue. I then made myself into a human snail. Oh, and don’t forget the Saran Wrap slime trail.

      I have a legitimate fear of slugs and snails, stemming back to my childhood (if you follow me on Instagram, you likely read my more detailed caption regarding this phobia), but when I saw an adorable little girl donning this creative DIY costume I knew it would be the perfect fit.

      This costume took me a couple of hours to make and all together cost me about $8-$10 (I spent more on the supplies, but I still have a ton of left over tape and ribbon accounting for less on the actual costume cost.) I had a great laugh putting this all together, but if I’m being honest the antennas freaked me out a bit.

      Old fears die hard.

      As proud as I was of this creative project, I only managed to wear this for 2 hours at work. The backpack shell hurt my shoulders and upper back more than I expected, and I decided to take it off. I was also quite warm with the thick sweater and the extra baggage made me uncomfortable.

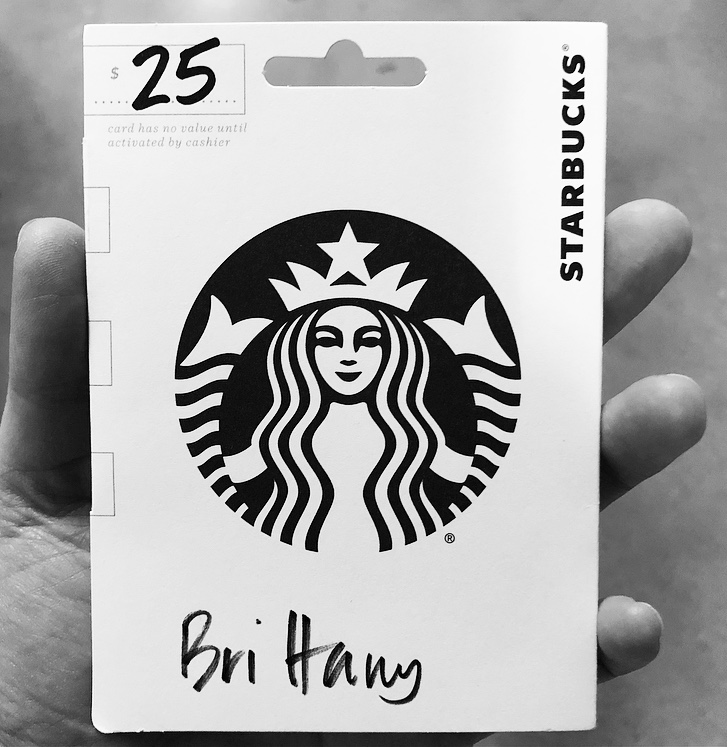
      This costume is a good option for a quick night of trick or treating, or perhaps a very short Halloween party, but definitely not for a full day of work. Carrying your home on your back ain’t easy! Ultimately this snail costume won me fourth place, and a $25 Starbucks gift card.

      I just can’t seem to escape Starbucks.

      While I originally didn’t plan to participate, REI dulcified dressing up by offering prizes, and at the end of the day it was a lot of fun. Winning a gift card was just an added perk. As for the new job, I have no idea how long I’ll be with REI, but I know it’s a great “right now” job for me.

      I welcome a company who respects their employees and encourages them to get outside.

      Q: Did you do anything for Halloween this year? With Covid it never truly felt like Halloween, even with these costumes.

      | 14 Comments Tagged Costume, DIY, Halloween, REI
    • DIY: Mason Jar Photo Flower Vase

      Posted at 3:46 AM by Brittany, on May 19, 2014

      This year for mothers day I wanted to do something a bit different than the traditional flowers and a card. I still wanted to give my mom flowers because she loves them, but this year I decided to make her a new vase to put them in, one with my face on it.

      006a

      When I take a break from baking to give my metabolism time to catch up to my waistline, I peruse Pinterest for craft ideas.

      007a

      While browsing a while back I stumbled upon this craft, and immediately knew what I wanted to do for my mom this past mothers day. What a genius idea. Mine didn’t turn out quite as nice as the original, but I find the flaws in my vase to be…charming.

      005a

      Here’s what you’ll need:

      • Small/Medium sized Mason Jar
      • Painters tape
      • Paint brush (I didn’t end up liking the one I used in the photo.)
      • Glass friendly paint
      • Scissors
      • Finishing spray

      003

      004

      If you have a fancy paper cutter that can cut your tape into a shape, by all means please do. I do not, so I used some scissors with this zig zag design on them.

      005

      Here’s what I did: I painted my jar over the course of a few days, applying multiple coats. Once I was done I peeled the painters tape off of the front, which ended up making a funky design because the paint dried to the tape making it difficult to remove. Owell.

      After I removed the tape, I took my jar outside to spray with the finishing spray, which left a foggy glaze over the spot where my photo will show. It turned out unique and made the photo look kinda cool when viewed through the glass. Continuing with the charming look.

      008a

      I chose a photo of my sister and I to stick inside the jar, and printed out a wallet size. I used the painters tape to tape the photo to the inside of the jar. You will want to use some kind of small cup to put inside for the water to ensure you don’t ruin your photo, I used a shot glass. I picked 4 random and fun flowers to match the pink vase.

      I loved the outcome!

      002a

      I think my mom liked it too. 🙂

      20140515-160904.jpg

      Q: What did you do with/for your mom for mothers day this year?

      atterned-n

      | 59 Comments Tagged Craft, DIY, Mason Jar, Mothers Day, Pinterest
    • Holiday Spirit

      Posted at 11:37 AM by Brittany, on December 21, 2012

      This is the easiest/most adorable craft you could possibly do for a Christmas gift.

      20121221-100720

      Salt shaker from Bed Bath and Beyond, a mini tree from Joanne’s, glitter, glue, saran wrap, and some ribbon! Simply glue the tree to the bottom of the shaker, put in whatever kind of glitter/fake snow you want, saran wrap the top so that the glitter doesn’t fall out, and wrap the top with a bow color of your choice!

      20121221-100708

      I just can’t get over the adorableness.

      Q: Have you made any holiday like crafts recently?? Share them with meee!! 

      brittany

      | 39 Comments Tagged Christmas, Craft, DIY, Pinterest
    • DIY: Compost Bin

      Posted at 4:37 AM by Brittany, on June 17, 2012

      Wasting food is worse than nails on a chalk board..almost. I shed a small piece of my heart each time I throw food into the garbage. I still have my entire heart because I refuse to waste, I will save even the smallest morsel of a meal to incorporate into the next. So what do I waste then? Scraps of food that I deem inedible: think watermelon rinds, lemon peels, garlic skin, wilted leafy produce. Rather than throw these away, why not compost them!

      Compost bins these days can be expensive, and take up a lot of space. There are plenty of DIY projects all over the internet, from digging holes in the ground to getting an old garbage can and filling it with left over food. I know someone who recently made a compost bin out of milk crates. It’s worked out well for left over scraps!

      DIY Compost Bin 

      You wont need much, just some milk crates (3 of them for a good rotation system), weed blocker, paper bags, and a hot glue gun. 

      These are the crates that were used. There are three, but I started with two to get the compost going. You won’t need the third one for a bit.

      Oh surprise, I used a TJ’s bag. You’ll need a sturdy paper bag to lay on the bottom of the bin. Eventually this will compost into your soil, but it will take time and lets the food break down first.

      You will take the weed block fabric of your choice, and hot glue it to the four side walls of the bin. Do not put a layer on the bottom, the bottom is only for the paper bag. You don’t want weeds growing into your compost, they taste like intruders.

      Glue glue glue. This part is dangerous, I couldn’t risk burning my clumsy sausage fingers.

      Voila, repeat these steps on the other two crates and you are almost ready to start spoiling food for fresh soil.

      Add a little bit of soil to get the bin started.

      The lid helps to keep the soil dark and moist, but you will need to let the bins have sun and water occasionally.

      Now for the rotation process: To make this easier to understand we will call the crates A, B, and C (eventually you will need three crates.) The top crate is A, middle crate is B, and bottom crate is C. Once crate A is 3/4 full you will swap it out with crate B. Crate B then comes to the top. Once crate B is 3/4 full, you will take whatever is left in crate A (which should be partially broken down by now) and POUR that into crate C. You will then put crate A back on top, and crate B back into the middle. This will begin your cycle. Crate C is there basically to collect the leftover waste that needs more time breaking down.

      This compost bin is strictly veg friendly. No meats or animal products will find their way into the bin. With meat you have to worry about other breakdown methods. If you want a meat friendly bin, this is the wrong blog for you.

      Q: Do you waste a lot of food? Ever thought about saving scraps like this? Someday this will be soil to fuel my garden! 

      | 82 Comments Tagged Compost, Compost Bin, DIY, Food, Gardening, Trader Joes, Waste
    • The First Harvest

      Posted at 9:28 AM by Brittany, on May 14, 2012

      It’s about time I gave you all an update on my wine box garden. So far I am beyond pleased with how things have turned out. It’s been just about two months, and I’ve already harvested some of the goods! Here are some before and after photos.

      Onions

      Beets 

      Carrots

      Swiss Chard

      The Swiss chard has amazed me the most! The wine boxes have seen better days, and probably wont be used again after this growing season. They have continued to do their job, and for that I love them! The remaining wine boxes (I told you I was hoarding them) will be used for shelving/decoration.

      The chard was getting so large in some spots that it was shading the little leaves below. Time to harvest.

      These will grow MUCH larger, but having a few right now was great. They were washed, cut, and mixed in with some lentils.

      It is so rewarding eating produce from your own garden, and this is just the beginning. I will literally pee myself when I eat my beets. I will probably cry too. It will be a messy moment.

      The beets and carrots have been thinned so hopefully they will grow into giant beet balls and carrot tubes. Everyone is invited over for a carrot,onion,beet,chard,garlic fest at my dinner table in another month or two.

      Q: Have you harvested anything from your garden yet? If you don’t have a garden have you tried any new produce lately?

      | 48 Comments Tagged DIY, Harvest, Produce, Wine Box Garden
    • DIY: Wine Box Garden

      Posted at 8:10 AM by Brittany, on March 23, 2012

      The mini garden I have been wanting to start has been completed. It was super easy, and a lot of fun. To start things off you will need the following:

      • Wine boxes
      • Soil
      • Plant starters/Seeds
      • Frost/Critter blanket
      • Wooden steaks (if your boxes are flimsy)
      • Something to prop the boxes on once complete
      • Power tools
      • Love and patience

      If you have sturdy wine boxes, you will not need to reinforce the box like I did.

      See that bucket in the background..the clout laundry detergent bucket? That was my front row seat to watching my friend do all the work. As I mentioned, these boxes were collected from Trader Joe’s. I had eight boxes total. Hoarding starts at a young age my friends. This is what the boxes looked like originally.

      Now you see why I have eight, these boxes are gorgeous. Despite the boxes good looks, the sides were not very sturdy. Insert a woodworking friend to fix the problem.

      Those 4 wooden pegs were nailed in to keep the sides from splitting. Now the box is ready to go. Next step-Drill holes in the bottom for drainage.

      I am the mastermind behind these six holes. I can be hired with the promise of cookies as my pay.

      Now the fun part-Time to get dirty! Pour your soil(s) in to the boxes and plant your goods! We used two different “dirts,” one as a base soil, and one with a fertilizer to nourish the plants. From top to bottom: Walla Walla onions, beets, swiss chard, and carrots!

      If you live somewhere that has the potential of getting frost still, like we do in Washington, a frost blanket is suggested. This also acts as an insulation while protecting your goods from creatures, slugs, passing neighbors, and slugs. Did I say slugs? I hate slugs…

      Lastly make sure the boxes can drain.

      We set the box ends onto left over wood for elevation. I ended up moving the wood under the box near the center more to evenly distribute the weight of the soil within the box.

      There you have it, making a wine box garden is THAT easy. You just need to find some sturdy wine boxes and the rest is simple. I do suggest using some form of a label to indicate which vegetables are in which box. You can spend money on something like this:

      Or you can be cheap like me and use parts that came inside the boxes, saw them into pieces and use a sharpie to write on the pieces of wood (see upper right corners of completed boxes.) OR you could make something like the poop stick by using a kitchen knife, and a hot glue gun to attach a label to the knife. Perhaps this will be another DIY post for the future.

      Growing a mini garden, or growing a small potted plant in your house is both fun and rewarding. Watching your plants grow is like watching your child complete grade school..I think. I don’t have children, except for my cats..but they don’t attend school. Either way it’s extremely satisfying doing this yourself!

      Q: Are you planting anything this season? If so..tell me what!

      | 49 Comments Tagged DIY, Gardening, Trader Joes, Veggies, Wine Box Garden
    • BRITTANY- Self proclaimed minimalistic nomad striving to maintain a balanced, healthy life with good food, long bike rides, deep connections, exploration, and lots of cucumbers.
    • If this blog does not meet your standards, please lower your standards.

    • Contact: blissfulbritt@yahoo.com
    • Like my witty attitude and delightful charm? Enter your
      e-mail below for the party to come straight to your inbox!

      Join 4,384 other subscribers
    • my foodgawker gallery
  • Looking for Something Specific?

  • Stalk My Past

Blog at WordPress.com.

  • Follow Following
    • Blissfulbritt
    • Join 4,384 other followers
    • Already have a WordPress.com account? Log in now.
    • Blissfulbritt
    • Customize
    • Follow Following
    • Sign up
    • Log in
    • Report this content
    • View site in Reader
    • Manage subscriptions
    • Collapse this bar
 

Loading Comments...